Showing posts with label Prosthetics. Show all posts

Sunday, September 25, 2011

Dead Foxes

Following our work on Nailed Darlings in July we were contacted by the production designer, Coco, about doing make-up and special effects for her second year VCA film titled Dead Foxes. I'm really proud of the work I did for this film and think its some of my best to date. Given the fact that it was a mere ten days from life-cast to having the fox prosthetics on set, especially so.

First up we life-cast the youngest person we've cast thus far: Isabella age 10. Isabella was recovering from a head cold so we put it off until the last possible day when she was feeling better. I was a little nervous going into this life-cast because of her age, but Isabella was easy to work with and a total professional. Before doing her face and neck we life cast her fingers so she understood the process. Plus she got fingers to take home with her.


Then I cleaned up the stone life cast and made a silicone mould with a fibreglass mother-mould of Isabella's face.


After doing this I made a fibreglass positive of her face to sculpt onto. The turnaround on this process was insanely tight: Day 1 lifecast, clean up, silicone mould, Day 2 fibreglass mother-mould, fibreglass positive, Day 3 trim edges of positive and clean with water and IPA, Day 4-5 sculpt prosthetic, Day 6 fibreglass mould, Day 7 trimming edges, cleaning moulds, silicone into nose, Day 8 pull piece, make whiskers, sculpt teeth, Day 9 mould teeth, make teeth, paint and varnish teeth, attach them. Day 10 last fiddling around with it.


The sculpt was probably the fastest I've ever done. I knew it had to be done quickly so I used plasticine rather than Chavant NSP which I would have used if I had another 2-3 days up my sleeve.


Finished piece before attaching it to actor's face.


Some shots that I think I'll probably use for my portfolio entry into Neill Gorton's course in the UK sometime next year.


With some practice Isabella managed to get really good movement out of the piece. But she only worked out she could move the mouth after finishing her scenes.


I also did character make-up for the lead actress, Sarah. The third day of shooting called for Sarah to look dirty in a fairly surreal scene set amongst the ruins of this amazing burned down house surrounded by rusted car bodies and corrugated iron.


I'm not sure that you could probably take a bad shot of Sarah and James on location for the third day of shooting.


All up I feel like everything worked really well on this film: from script, acting, sets and locations, to make-up, production design and direction.

Nailed Darlings


Earlier in July we were approached by Robbie, a VCA filmmaker, to do make-up, hair and special effects on his second year film. We had planned on taking a bit of a break from doing student films but Robbie had written a fantastic and unconventional horror-chick flick script that after reading and discussing the overall aesthetic we really wanted to be involved in.


After doing a cheap alginate life-cast of the back of the lead actress's head and neck we did some re-sculpting work before making a mould for a prop spfx head.


A big part of this project was making a variety of moulds for different purposes: some for props and others for making prosthetics. The following clip shows three moulds in various stages:


Nailed Darlings involved four prosthetic wound applications: one on a lead actor's face, another on her back and then applications on the other lead actress's throat and back of neck. For this project we made and used encapsulated silicone appliances and adhered with a combination of Telesis and silicone. I've come to favour silicone as an adhesive due to ease of clean up and not having to use generally harsh solvents on an actors skin for clean up. We've now pretty much got most adhesion issues sorted out and the pieces on one actor's back would have lasted for over a day's shoot without the edges coming up.


Nailed Darlings also called for quite a lot of blood work; for this we used a Mouldlife product called Kensington Venial. It looks great, doesn't dry out, doesn't stain an actor's skin and only needs water for clean up.


Nailed Darlings involved significant hair and make-up as well as prosthetics and special effects on a tight budget. When talking with independent or student filmmakers who haven't used prosthetics or practical special effects before its always a bit of a shock to them when we tell them what it costs to make something. It's also a bit tricky explaining processes, but needless to say its really easy to quickly blow hundreds of dollars on materials for making stuff. I thought we'd get the work for this film in just under the modest special make-up fx budget of $600, but we ended $180 over not counting outlay costs for things we could reuse like the wig ($40) and HIPS (~$40). However, what we learned from this film was arguably worth this.

Equally the work that's the most risky in terms of going over budget is also the most interesting and fun for us. The difficult thing tends to be estimating what something might cost which you've never made before. For feature films though the material costs will always be the smaller cost next to labour. At IMATS last year I learned that up the big end of town full facial silicone prosthetics can cost up to $20,000 before they are even applied on set! Full silicone bodies with significant resculpting can cost up to $100,000!!! Seems like a lot, but anywhere between one and six people may have worked on something like this for many hours in the studio before it makes it on set. So bigger picture and all that; I'm really proud of what we got done with what we had and hopefully it'll all make for a great short film.

Friday, February 18, 2011

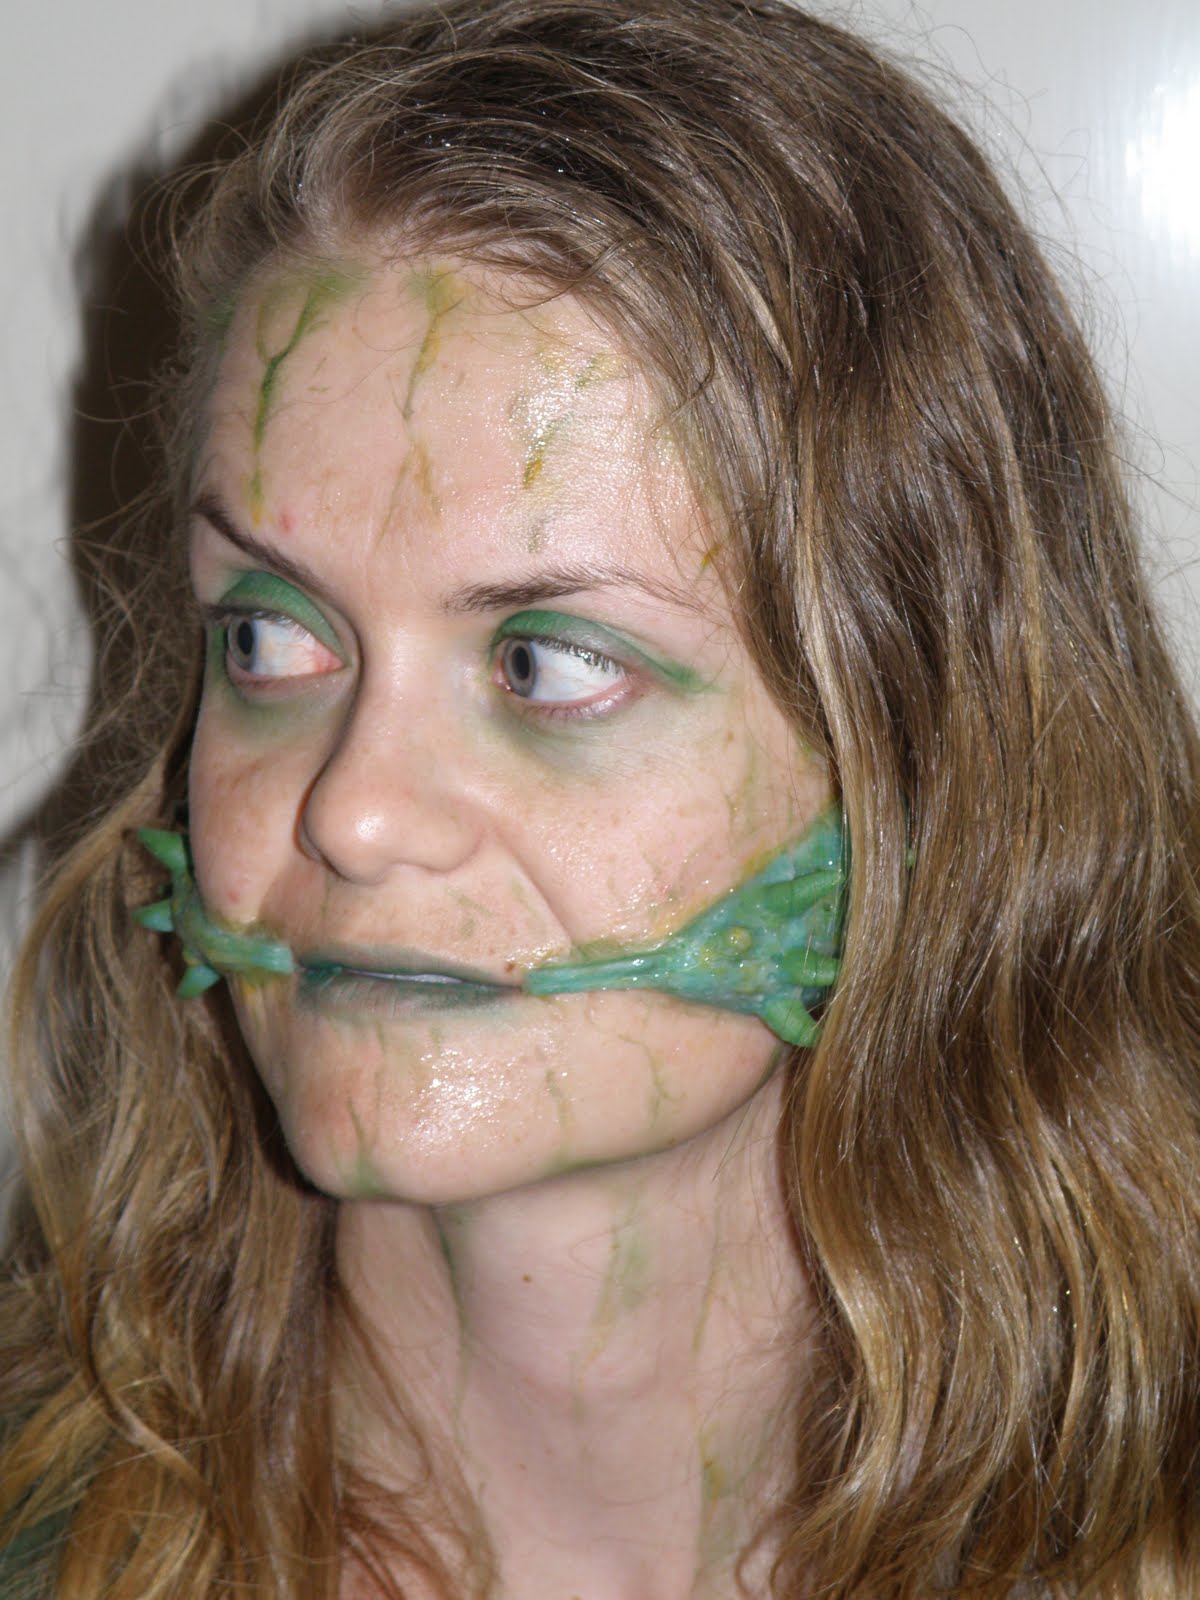
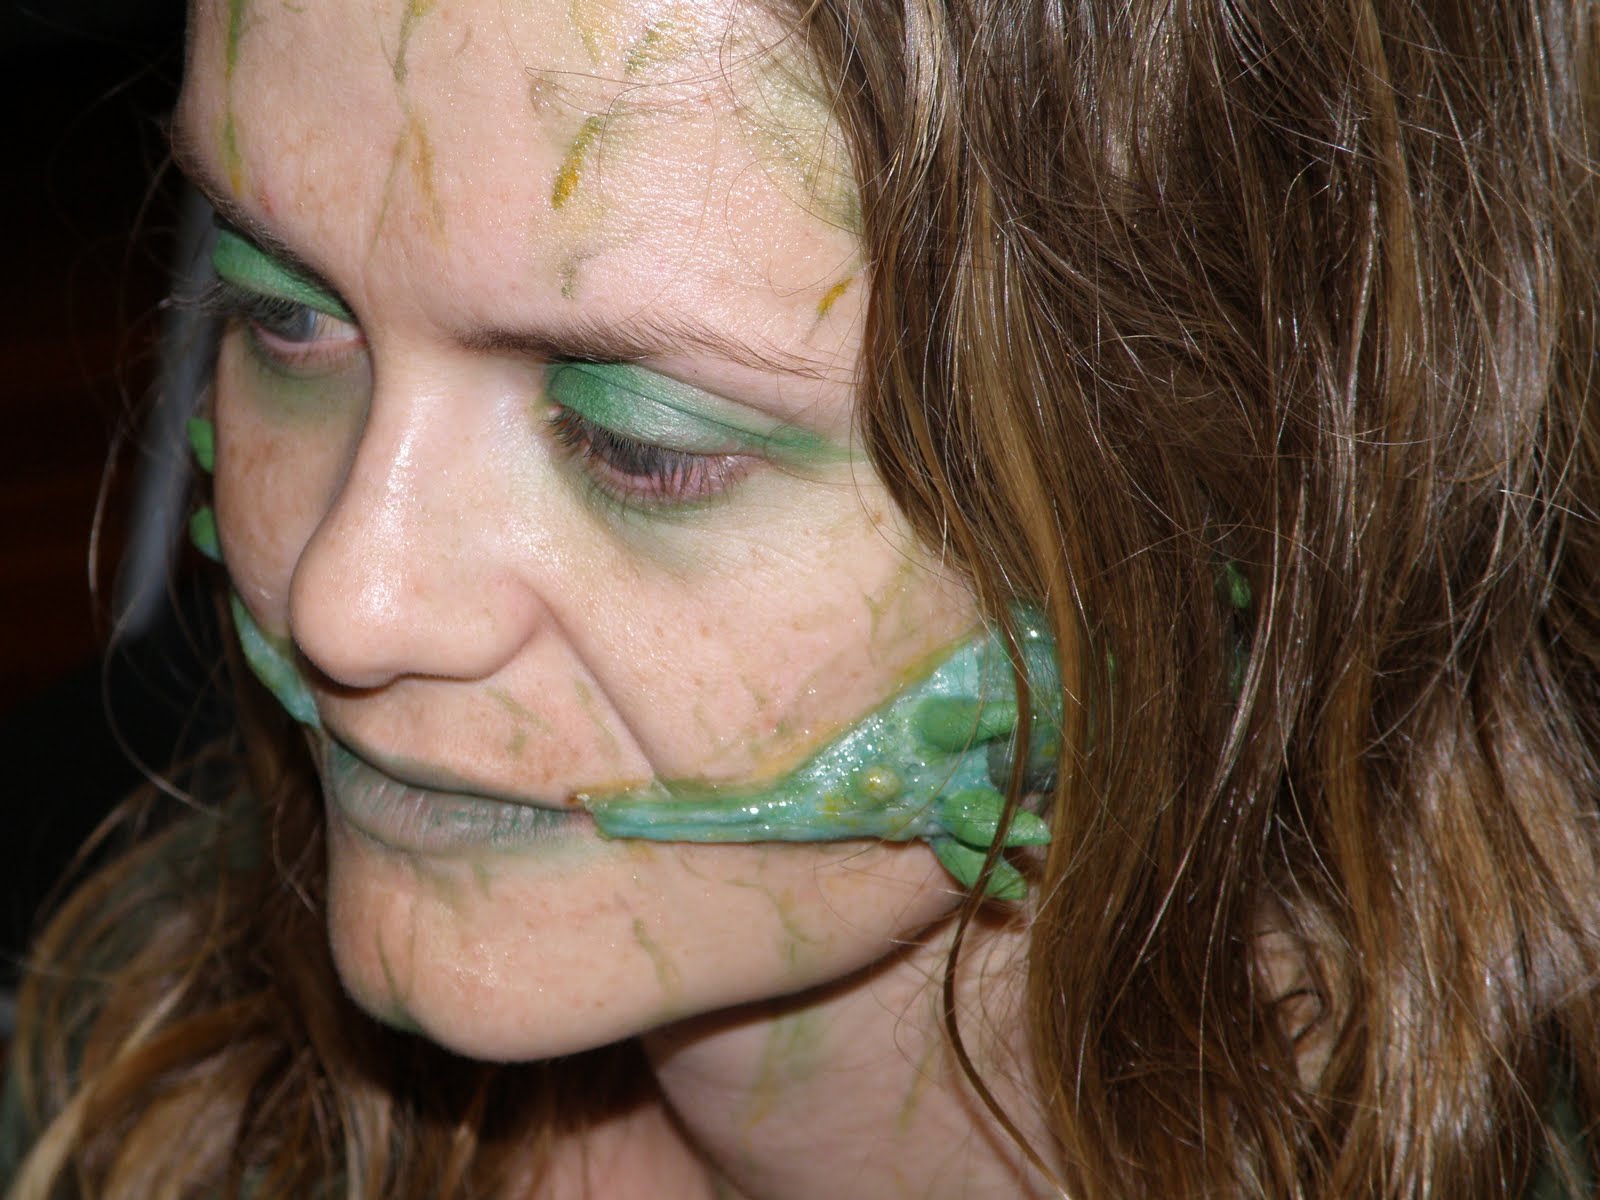
Alien Plant Symbiote

Last weekend I tried to create an alien plant symbiote effect. While I learned a lot from doing this application, I've just got some really good feedback from someone on how to improve the overall effect and make-up after sending them some of these images. I really think I need to spend a bit more time thinking through a design before going into sculpture and applying the make-up.


Thursday, October 7, 2010

Encapsulated silicone wound prosthetics

Some pics of the encapsulated silicone prosthetic wounds that I've recently made with edges that can be blended off:

Large cuts:


Bullet wounds:


Small cuts:

Wednesday, October 6, 2010

Fibreglass Corpse Mould

Last Friday I made a two part fibreglass mould of a decaying corpse sculpt. I sought assistance from Mady for this process, as two sets of hands are better than one when it comes to doing so much of any special effects or similar type processes. I had finished the quick sculpt earlier that week, chopped up the fibreglass matting and organized the materials.

First we built a mould wall out of WED clay. The WED clay I wanted to reuse was a bit old and dry, so we had to wet it a bit, but even then we had to repair some cracks from it being in the heat of the sun.


Then we donned safety equipment. Don't mess about with fibreglass without a good mask with filters designed to deal with organic vapours from polyester fumes. We worked in a well ventilated space: outdoors. We also double gloved. We probably could have also worn long sleeved shirts and possibly safety glasses for the whole process, we did for some parts but glasses fog up! Most of the materials involved in doing fibreglassing are hazardous. WARNING: do not attempt working with fibreglass without having had some proper instruction from someone who knows what they are doing beforehand! I received training from Justin Dix at Wicked of Oz earlier this year. We also should have worn sunscreen as an actual hazard on the day was the sun!

We then laid up the first half of the mould, gelcoat, followed by layers of matting and laminating resin, then lastly a tissue coat for handling and translucency. For the first half we used four brushes, so for a two part mould expect to go through eight brushes with two people working as they are pretty much stuffed from the resin afterwards. As you can see in the picture below we had a bit of an overhang on the mould flange, which we needed to cut off so there was no grab points before doing the second half.


After this the back of the sculpt needed to be quickly cleaned up and a bit of resculpting work done before doing the other half. We also popped the mould keys out with a screwdriver. Before starting the other half I made sure we applied enough release agents to the surface of the fibreglass flange of the completed the front half. If you don't do this the fibreglass will simply bond to itself! Mady rocks the mould making:


We then laid up the second half of gelcoat, fibreglass and laminating resin, then tissue coat. Initially I started with about 4% catalyst, but this was unnecessary as it was a warm sunny day and heat effects the work time, so by the last batch I'd dropped the catalyst down to 1%. Be a bit careful with the amount of catalyst you use as you can set the resin, the mould and yourself on fire if you over-catalyse it too much! Anyway, this did not happen. If you look closely you can see a little bit of plant matter got stuck in the mould just as we applied the tissue coat:


Then after more cleanup of the edge I drilled some bolt holes then pried apart the mould with two screwdrivers.


The plasticine had melted a bit from the heat of the sun and the mould making.


I then set about cleaning up the remaining plasticine from out of the mould, then finally after a bit of work a finished two part fibreglass mould:


Tuesday, August 31, 2010

Prosthetic umbilical cord in silicone

Our most recent student film project led me to make an umbilical cord to be attached to a baby. This presented several challenges around colour and adhesion. All up it was a fun little project to work on, especially since it was certainly something that I would have never set out to make myself.


In the end the process I used to make was also quite simple.

First I sourced a few different sized rods all about a metre (1 yard) long. I initially thought that one rod that was 18mm (3/4 of an inch) was about the right size for the cord but as it turns out one that was 9mm (about 1/3 of an inch) was the one that I made the finished product on. The 18mm one was way too big.

Then I taped the rod to cardboard, tinted a small batch of silicone to a skin tone, thickened it and then brushed it onto the rod.

After this batch had cured, I flipped the rod over, taped it down again and brushed another batch of silicone onto the other side of the rod to form the basis of my tube - cord.

Then I brushed on two further layers of silicone onto the rod which I tinted blue. This was to give a bluish hue under the surface of the umbilical cord to give the impression of blood flow.

After these had cured I pulled the tube off the rod and had the basis for a cord. As I was not happy with the first two cords in terms of size and colour it was a case of third time lucky!

I then adhered the tube to a flat blob of silicone to create an end to be stuck on the baby. Then I stuck this new flat end to a piece of glatzan - for a fine edge and to give something that could be blended off (as it turns out Alana decided against blending it off on set because of risks of acetone, which was the right decision - plus I should have just got a bald cap plastic that could be blended off with 99% isopropol alcohol). I then used a little more silicone to cover the edge between the silicone end piece and the piece of glatzan.


And before you can say 'Umbilical cords attached to placentas seem a bit strange when you actually think about it...' I had made a lovely prosthetic umbilical cord:

Sunday, August 1, 2010

Australian comedy meets sci-fi

Alana and I have just finished work on a fantastic Australian comedy-sci-fi tv pilot. We thought we'd share some of our work from this experience with our friends and followers of our blog.

It was a lot of hard work both in pre-production and during the shoot, but awesome fun! We worked with a really great team of people both before the shoot and during production. It was an absolute pleasure to work with and meet: Mady (lifecasting), Eve (sculpting/moldmaking/prosthetics/makeup), Andi (makeup), Steph (makeup), Sorjeri (costuming/makeup), Holly (costuming) and Jess (stylist). The actors were also such a great bunch of people to work with. Last but not least a big thanks to Kai and Tess for letting us play in their world.


Sunday, June 6, 2010

Fawn test

Last night I did a test run for the ruddy fawn appliance that I made. I put the piece on and did a rough and ready makeup in 30 minutes, which in hindsight I needed a little more time. Here is the completed piece shot on digital camera with flash and maximum lighting:


The pigmentation in this first silicone piece was a bit of an experiment. I got a bit excited with red flocking, so it has quite a flushed tone. So while I don't mind the colour I was never 100% happy with the match between this pigmentation and Alana's skin tone. So I made and painted a second piece with matching ears which turned out with a better edge on the prosthetic, a near identical match with Alana's skin tone and a slightly better paint job. Practice, as they say, makes perfect. Here are the two pieces side by side to get some comparison:


I stuck the piece on using Telesis 5 silicone adhesive mixed with some thinner. This stuff is a great adhesive, but a little tricky to work with because it dries very fast which is why you need thinner. Altogether for a 15ml bottle of Tel 5, 60ml bottle of thinner and 237ml bottle of super solv we paid $94AU. (I was waiting on some super solv to arrive before I did this application). I used a fantastic red pigment from Ben Nye to blend the ruddy appliance with Alana's skin tone. The edges were powdered down to remove shine. The Ecoflex 50 silicone takes makeup beautifully.


Here is the left profile:


Right profile:


A close up shot of the forehead (I was really happy with the top blended edge):


Here is a close up over the eye, it is not terrible but I can pick out the edges more than I'd like:


And here is a shot that shows up the edge around the lip. This is probably the most stand out edge of the whole thing! However, this was actually a problem of me not using enough Telesis 5 adhesive and being rushed before we went out to dinner rather than a problem with the prosthetic:


Overall I learned a lot from this application and making the piece. One thing that came back to haunt me was from a much earlier process of doing the life cast where I ran short of ultracal 30 so had a shallower stone positive. Which meant that the sculpt did not go as far back as it probably could of and the edge over the edge of Alana's eyebrows might need patching with extra flesh if I go to get this shot professionally.

I'm now feeling ready to organise costume and photographer and get some quality snaps of the finished creature! I just need some crows feathers, furry fawn pants and a spear! Bet Alana can't wait to get some furry pants on and have me stick hair to her!

Friday, May 28, 2010

Fawn redux

Opened mold this morning with some anticipation. But after a bit of prying it popped open to reveal a lovely prosthetic appliance! So without further ado here is the fawnesque redux ta-daa!