First we built a mould wall out of WED clay. The WED clay I wanted to reuse was a bit old and dry, so we had to wet it a bit, but even then we had to repair some cracks from it being in the heat of the sun.

Then we donned safety equipment. Don't mess about with fibreglass without a good mask with filters designed to deal with organic vapours from polyester fumes. We worked in a well ventilated space: outdoors. We also double gloved. We probably could have also worn long sleeved shirts and possibly safety glasses for the whole process, we did for some parts but glasses fog up! Most of the materials involved in doing fibreglassing are hazardous. WARNING: do not attempt working with fibreglass without having had some proper instruction from someone who knows what they are doing beforehand! I received training from Justin Dix at Wicked of Oz earlier this year. We also should have worn sunscreen as an actual hazard on the day was the sun!
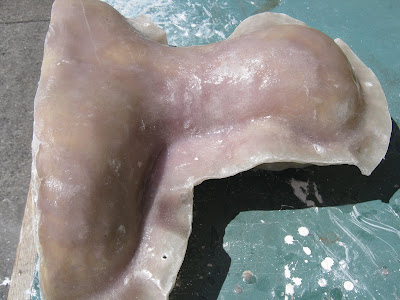
We then laid up the first half of the mould, gelcoat, followed by layers of matting and laminating resin, then lastly a tissue coat for handling and translucency. For the first half we used four brushes, so for a two part mould expect to go through eight brushes with two people working as they are pretty much stuffed from the resin afterwards. As you can see in the picture below we had a bit of an overhang on the mould flange, which we needed to cut off so there was no grab points before doing the second half.

After this the back of the sculpt needed to be quickly cleaned up and a bit of resculpting work done before doing the other half. We also popped the mould keys out with a screwdriver. Before starting the other half I made sure we applied enough release agents to the surface of the fibreglass flange of the completed the front half. If you don't do this the fibreglass will simply bond to itself! Mady rocks the mould making:

We then laid up the second half of gelcoat, fibreglass and laminating resin, then tissue coat. Initially I started with about 4% catalyst, but this was unnecessary as it was a warm sunny day and heat effects the work time, so by the last batch I'd dropped the catalyst down to 1%. Be a bit careful with the amount of catalyst you use as you can set the resin, the mould and yourself on fire if you over-catalyse it too much! Anyway, this did not happen. If you look closely you can see a little bit of plant matter got stuck in the mould just as we applied the tissue coat:

Then after more cleanup of the edge I drilled some bolt holes then pried apart the mould with two screwdrivers.

The plasticine had melted a bit from the heat of the sun and the mould making.

I then set about cleaning up the remaining plasticine from out of the mould, then finally after a bit of work a finished two part fibreglass mould:


No comments:
Post a Comment